

Resistance Bands: The Ultimate Guide to Choosing and Using Them for a Full-Body Workout

Feeling overwhelmed by the rainbow of fitness gear promising a gym-quality session from your living room? You're not alone. The world of resistance bands can be a confusing place, filled with questions: Which type is best for toning your glutes? Do the colors actually mean anything? And most importantly, can these simple elastic tools really deliver a powerful, full-body workout you can trust? It's easy to feel stuck before you even start, worried about choosing the wrong band or not knowing how to use it effectively.
Consider this your official roadmap to mastering at-home fitness. In this ultimate guide, we'll demystify everything. You'll discover the different types of bands, learn exactly how to choose the perfect set for your goals, and unlock a complete library of essential exercises that target every major muscle group. Get ready to transform that simple band into your personal, portable gym and build strength, tone your body, and feel confident in your workout routine-no expensive membership required.
What Are Resistance Bands & Why Are They a Home Gym Essential?
Resistance bands are incredibly versatile elastic tools designed for strength training, mobility work, and rehabilitation. Unlike bulky gym equipment, they are lightweight, affordable, and compact, making them the perfect addition to any home gym, travel bag, or workout routine. They offer a simple yet powerful way to challenge your muscles and achieve a full-body workout anywhere, anytime.
The magic of these bands lies in a principle called variable resistance. This means the tension increases as you stretch the band, forcing your muscles to work harder through the entire range of motion. For a deeper dive into the science and history behind them, this guide on What Are Resistance Bands is an excellent resource. This constant tension is what makes them so effective for building strength and endurance.
To see how this translates into a powerful workout, check out this follow-along routine:
Resistance Bands vs. Free Weights: What's the Difference?
While free weights rely on gravity, providing peak resistance at a specific point in the lift, bands provide continuous tension. This forces your muscles to stay engaged from start to finish, activating smaller stabilizing muscles that are often missed. Because they place less direct load on your joints, they are a fantastic, joint-friendly alternative. For an extra challenge, you can even combine both, adding a band to a barbell squat or bench press.
The Core Benefits for Every Fitness Level
Whether you're a seasoned athlete or just starting your fitness journey, resistance bands offer unique advantages:
- For Beginners: They provide a safe and effective way to learn proper form and movement patterns without the risk associated with heavy weights.
- For Advanced Users: Use heavier bands for progressive overload to build muscle, or lighter ones for assistance with challenging exercises like pull-ups.
- For Rehabilitation & Mobility: Their low-impact nature makes them ideal for physical therapy, targeted stretching, and improving overall flexibility and joint health.
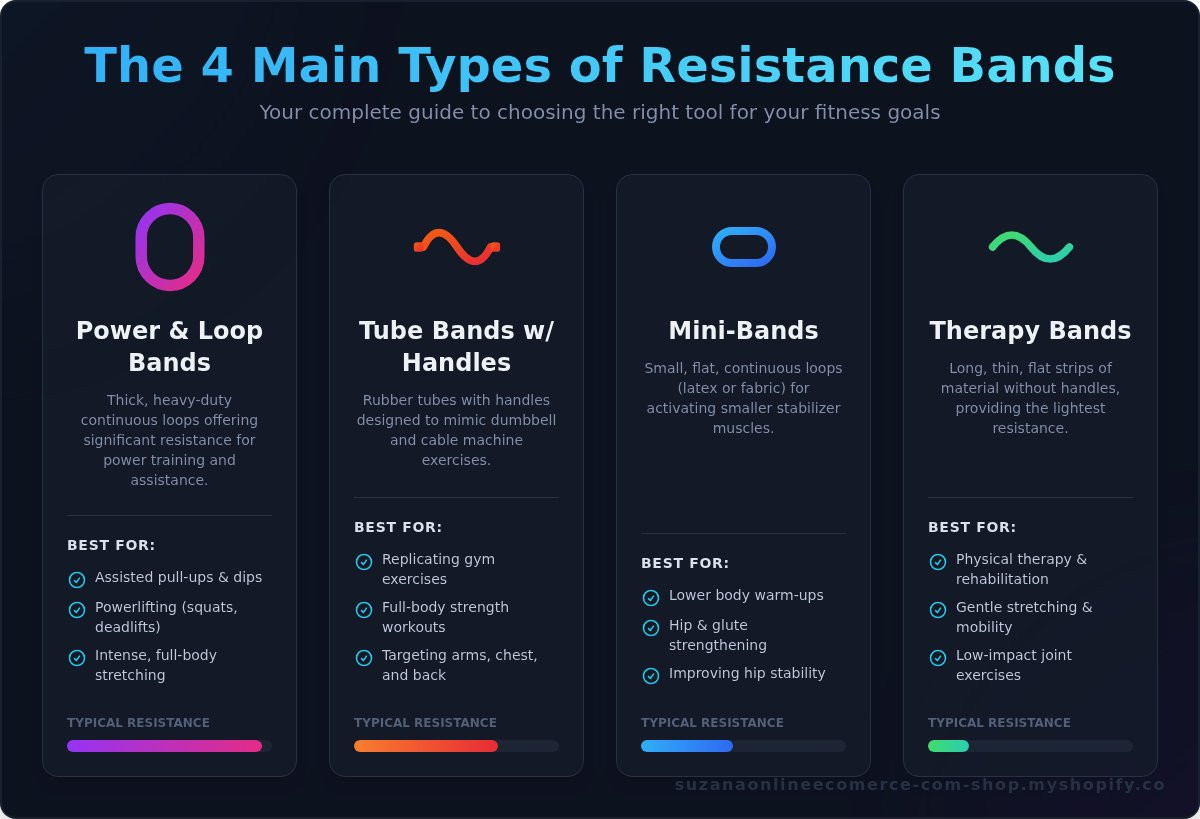
A Complete Guide to the 4 Main Types of Resistance Bands
Stepping into the world of resistance bands can feel overwhelming with all the options available. But understanding the main types is the first step to unlocking their full potential. Each band is designed with a specific purpose in mind, from gentle rehabilitation to explosive power training. Their versatility is what makes them a cornerstone of any home gym; in fact, experts at the Mayo Clinic Health System have demonstrated how to get an effective 15-minute, full-body workout using just a single band. Let's break down the four primary types to help you choose the right tool for your fitness goals.
Power & Loop Bands
Often called "super bands," these are thick, heavy-duty continuous loops of rubber. They offer significant resistance and are built for durability. Their closed-loop design makes them perfect for anchoring to pull-up bars or power racks, allowing you to add assistance or resistance to major compound movements.
- Best for: Assisted pull-ups, powerlifting (e.g., adding resistance to squats and deadlifts), and intense, full-body stretching.
Tube Bands with Handles
These are lengths of rubber tubing with a comfortable handle attached to each end. They are designed to mimic the movements you would perform with dumbbells or cable machines at the gym. Most sets come with a door anchor, which dramatically increases the number of exercises you can perform, such as chest presses, rows, and lat pulldowns.
- Best for: Replicating traditional strength training exercises, full-body workouts, and targeting specific muscle groups like biceps and triceps.
Mini-Bands (Hip Circle / Booty Bands)
Mini-bands are small, flat, continuous loops that fit snugly around your thighs, calves, or ankles. They are exceptional tools for activating smaller stabilizer muscles, particularly in the hips and glutes. These come in two common materials: thin latex for more stretch and fabric-covered versions that offer a non-slip grip and higher durability.
- Best for: Lower body activation warm-ups, hip and glute strengthening (e.g., clamshells, glute bridges, lateral walks), and improving hip stability.
Therapy & Light Resistance Bands
These are long, thin, flat sheets of latex or non-latex material that do not have handles or form a loop. They provide the lightest resistance and are typically used by holding the ends. Their gentle tension is ideal for those new to exercise, recovering from an injury, or focusing on mobility and flexibility.
- Best for: Physical therapy, rehabilitation exercises, gentle stretching, and low-impact mobility work for joints like the shoulders and hips.
How to Choose the Right Resistance Bands for Your Goals
Selecting the right resistance bands is the first and most critical step toward a safe and effective workout. Using a band that's too light won't challenge your muscles, while one that's too heavy can compromise your form and increase the risk of injury. This guide breaks down the selection process into simple, actionable steps to ensure you find the perfect match for your fitness level and aspirations.
Decoding Resistance Levels (Colors and Weight)
Most brands use a color-coding system to signify tension, but this can vary. A common progression is yellow (light), red (medium), blue (heavy), and black (extra-heavy). However, the most reliable indicator is the manufacturer's listed weight equivalent (e.g., 15-25 lbs). As a beginner, it's always best to start with a light-to-medium band to master proper form before advancing to higher resistance.
Matching Bands to Your Fitness Goals
The ideal band type depends entirely on what you want to achieve. To simplify your choice, match your primary goal to the recommended band style:
- For Strength Building: Choose heavier, thick loop bands for compound exercises like squats and deadlifts. Tube sets with handles are also excellent for chest presses and rows.
- For Toning & Endurance: Medium-resistance tube bands or mini-loop bands are perfect for higher-repetition exercises that target arms, shoulders, and glutes.
- For Mobility & Rehab: Select light therapy bands. Their gentle resistance is ideal for warm-ups, stretching, and physical therapy movements that focus on joint stability and recovery.
Should You Buy a Single Band or a Full Set?
While buying a single band might seem like a good way to start, a full set offers significantly better value and versatility. Your body’s muscle groups have different strengths-your legs can handle far more resistance than your biceps. A set allows you to switch tensions between exercises and, most importantly, enables progressive overload. As you grow stronger, you can simply move up to the next band to continue making progress.
Feeling overwhelmed by the options? We've taken the guesswork out of it. Explore our curated resistance band sets to find the perfect all-in-one solution to get started.
12 Foundational Resistance Band Exercises for a Full-Body Workout
Now that you understand the different types of bands, let's put them to work. This routine targets all major muscle groups for a balanced and effective workout. Focus on controlled movements and proper form to maximize results and prevent injury. For each exercise, aim for 10-15 repetitions for 2-3 sets.
Upper Body Exercises
-
Bicep Curls: Using tube bands with handles, stand on the middle of the band with feet shoulder-width apart. Keep your elbows tucked at your sides and curl the handles up toward your shoulders, squeezing your biceps at the top. Lower with control.
(A GIF demonstrating the bicep curl motion would be placed here.)
- Bent-Over Rows: Stand on a loop or tube band with feet shoulder-width apart, holding the handles or ends. Hinge at your hips with a flat back. Pull the band toward your chest, squeezing your shoulder blades together.
- Overhead Press: Stand on a tube band and hold the handles at shoulder height, palms facing forward. Press the handles straight up overhead until your arms are fully extended.
- Chest Press: Anchor a tube band to a sturdy object behind you at chest height. Facing away from the anchor, grab the handles and step forward to create tension. Press the handles straight out in front of your chest.
Lower Body Exercises
- Glute Bridges: Place a mini-band just above your knees. Lie on your back with knees bent and feet flat on the floor. Drive through your heels to lift your hips toward the ceiling, keeping your knees apart against the band's tension.
- Squats: Step inside a large loop band, placing it under your feet and resting the other end across your shoulders. Keeping your chest up, lower into a squat as if sitting in a chair.
-
Lateral Band Walks: With a mini-band around your ankles or just above your knees, assume a half-squat position. Step sideways, keeping your feet parallel and maintaining tension in the band.
(An image showing the starting position for lateral walks would be placed here.)
- Clamshells: Lie on your side with a mini-band above your knees, legs stacked, and knees bent at a 90-degree angle. Keeping your feet together, lift your top knee toward the ceiling.
Core Exercises
- Banded Crunches: Anchor a tube band to a high point. Kneel facing away from the anchor, holding the handles at your head. Crunch down, bringing your elbows toward your knees.
- Pallof Press: Anchor a tube band at chest height to your side. Stand sideways to the anchor and hold the handle with both hands at your chest. Press the handle straight out, resisting the urge to rotate.
- Bicycle Crunches: Place a mini-band around the arches of your feet. Lie on your back and perform a bicycle crunch, feeling the added resistance as you extend each leg.
- Plank with Leg Lifts: Get into a high plank position with a mini-band around your ankles. Keeping your core tight and back flat, lift one leg straight up against the band's resistance. Alternate legs.
Safety, Care, and Progressing With Your Bands
Maximizing your workout isn't just about the exercises-it's about using your equipment correctly and safely. To ensure your resistance bands support your fitness journey for the long haul, a little attention to safety, care, and progression goes a long way. Following these guidelines will help you prevent injury, extend the life of your bands, and continue making progress.
Safety First: How to Avoid Snapping and Injury
Your safety is paramount. While bands are generally very safe, improper use can lead to snapping or injury. Before you start any workout, quickly run through this simple checklist:
- Always Inspect Your Bands: Before each session, give your band a quick visual check for small nicks, tears, or worn spots. A tiny flaw can become a major weak point under tension. If you find any damage, replace the band immediately.
- Never Overstretch: A good rule of thumb is to never stretch a band more than twice its resting length. Pushing it beyond its limit can cause it to weaken and eventually snap.
- Ensure a Secure Anchor Point: If you are using a door anchor or wrapping the band around a post, double-check that it is completely stable and can handle the force you'll be applying. A shifting anchor is a serious hazard.
Proper Care and Storage
A little care can dramatically increase the lifespan of your bands. To keep them in top condition, avoid common mistakes that degrade the material over time.
- Keep Away From Sunlight: Store your bands out of direct sunlight and away from extreme heat or cold, as these conditions can make the material brittle.
- Clean Gently: After a sweaty workout, simply wipe your bands with a damp cloth. Avoid using soaps, solvents, or harsh chemicals that can break down the latex or rubber.
- Store Untangled: Keep your bands stored flat, hung on a rack, or neatly rolled in a carry bag to prevent tangles and premature wear.
How to Progress Your Workouts
As you get stronger, your workouts need to adapt to keep challenging your muscles. This is where the versatility of resistance bands truly shines. When an exercise starts to feel too easy, it's time to level up.
- Move to a Stronger Band: The most straightforward way to progress is to switch to a band with a higher resistance level. When you're ready for a greater challenge, you can explore a new set of high-quality bands with a wider range of tensions.
- Increase Your Volume: Simply add more repetitions or an extra set to your exercises to increase the total workload on your muscles.
- Slow Down the Tempo: Increase the time under tension by performing each movement more slowly. Focus on a controlled 3-second count on both the concentric (lifting) and eccentric (lowering) phases of the exercise.
Unleash Your Strength, Anywhere, Anytime
As you've seen, the power of a full-body workout is no longer confined to the gym. From understanding the different types to mastering foundational exercises, you now have the knowledge to transform your fitness routine. These simple yet powerful resistance bands are your key to building strength, improving flexibility, and achieving your goals on your own terms.
When you're ready to take the next step, investing in quality you can trust is key. Our bands are the most versatile and cost-effective tool for your home gym, made from durable, snap-resistant materials to keep your workouts safe and effective. With sets available for all fitness levels, from beginner to pro, we have the perfect option to support your goals. Ready to start your journey? Shop our full collection of resistance bands today!
Your path to a stronger, healthier you is just a stretch away. Embrace the challenge and discover what you're capable of.
Frequently Asked Questions
Can you actually build muscle with resistance bands?
Absolutely. Muscle growth, or hypertrophy, occurs when muscles are challenged through tension, a principle known as progressive overload. Resistance bands provide continuous tension throughout an exercise's range of motion. To build muscle, you must consistently increase the challenge by either moving to a stronger band, increasing your repetitions, or slowing down the movement to increase time under tension. They are a highly effective tool for stimulating muscle adaptation and growth.
How often should I replace my resistance bands?
The lifespan of resistance bands depends on their quality and frequency of use, but a general guideline is to replace them every 6 to 24 months. Before every workout, you should inspect your bands for any signs of wear and tear, such as small nicks, holes, or discoloration. If you notice any damage or feel the elasticity has significantly decreased, replace the band immediately to prevent it from snapping during use and causing potential injury.
Are fabric or latex resistance bands better?
The best choice depends on your workout. Latex bands are very versatile, offering a greater stretch and a wider range of resistance levels, making them ideal for upper-body exercises and rehabilitation. Fabric bands are wider, more durable, and designed not to roll or slip. Their robust nature provides heavier resistance, which is perfect for lower-body exercises like squats, hip thrusts, and glute bridges. Many people find having both types is beneficial for a well-rounded routine.
What resistance level should a complete beginner start with?
A complete beginner should always start with the lightest resistance band in a set. These are often color-coded (like yellow or red) or explicitly labeled "Light." The initial focus should be on mastering proper form and technique for each exercise. Once you can comfortably perform 12-15 repetitions with perfect form, you are ready to progress to the next level of resistance. Starting too heavy increases the risk of injury and compromises your form.
How do I stop my mini-bands from rolling up during exercises?
Band rolling is a common issue, often caused by placement. Ensure the band is completely flat against your skin or leggings before you start. For exercises like squats or glute bridges, try placing the band higher up on your thighs rather than close to your knees. If rolling persists, consider switching to wider, fabric-style bands. Their material and increased surface area are specifically designed to grip better and stay securely in place during movement.
Are resistance bands effective for weight loss?
Yes, resistance bands are a fantastic tool for weight loss. While weight loss is primarily achieved through a calorie deficit, building lean muscle mass is key to boosting your metabolism. Strength training with resistance bands helps you build that muscle, which in turn increases the number of calories your body burns at rest. Combining band workouts with a balanced diet and cardiovascular exercise creates a powerful and sustainable strategy for achieving your weight loss goals.